Use GCP Cloud Endure To Scan And Replicate VM In Google Cloud Platform Compute Engine
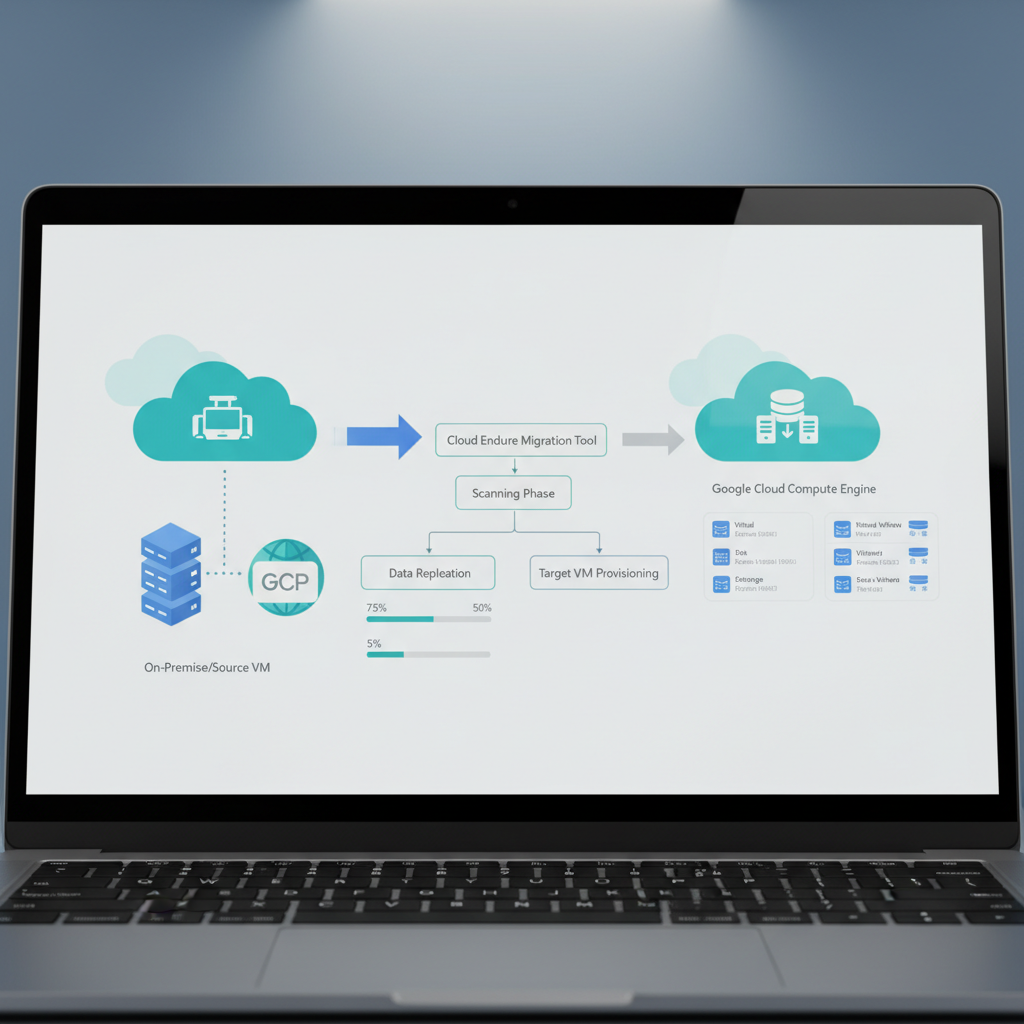
Moving a virtual machine to Google Cloud Platform is more than copying a disk. You need to capture changes while the source remains online, prepare a network where the replacement can boot, and prove that the application works before redirecting production traffic.
CloudEndure’s agent-based replication can help with that process. In a GCP-enabled CloudEndure migration workflow, an agent reads the source machine’s disks and continuously replicates changes into a staging area. At launch time, CloudEndure uses the replicated data to create a target VM in Google Compute Engine.
This guide describes a 2019-era workflow; CloudEndure availability, supported destinations, tools, and interfaces may have changed since then.
One important qualification: CloudEndure is a third-party migration product, not a native GCP scanning service. Before starting, confirm that your CloudEndure account and project support Google Cloud as a destination. Product availability and migration versus disaster-recovery capabilities depend on the offering available to your account.
What “scan and replicate” actually means
Here, scan means discovering the machine’s disk layout and reading its blocks for initial replication. It does not mean checking for malware, finding application vulnerabilities, or automatically mapping every dependency.
The migration workflow has three main parts:
- Source machine: The existing physical server or VM, with the CloudEndure agent installed.
- Staging area: Temporary replication resources and disks in the destination cloud that receive the source data.
- Target machine: The Compute Engine VM created from replicated data for testing or production cutover.
After the initial synchronization, the agent tracks disk changes and sends them to the staging area. This reduces the amount of data that must move during the final maintenance window.
Replication does not automatically make an application ready for production. IP addresses, firewall rules, database consistency, service accounts, and external integrations still need attention.
1. Check eligibility and inventory the source
Before creating replication resources, verify the current support requirements for your CloudEndure project. Confirm GCP destination support, supported source operating systems and kernels, disk-layout restrictions, and required installation privileges.
Do not assume that instructions for another CloudEndure destination work unchanged on Google Cloud.
Record the machine’s configuration
Build a short inventory containing:
- Operating system, version, and architecture.
- CPU, memory, attached disks, and used storage.
- Partitions, mount points, and filesystem types.
- Running applications and their startup dependencies.
- Listening ports, DNS records, and external services.
- Backup arrangements and recovery requirements.
On a Linux source, these commands provide a useful starting point:
uname -a
cat /etc/os-release
lsblk -f
df -h
ip addr
ip route
sudo ss -lntup
These are inventory commands, not CloudEndure commands. Their availability varies by distribution; older systems may use alternatives such as netstat.
For Windows, collect comparable information through System Information, Disk Management, Services, and your existing administration tools.
Identify dependencies before copying data
A replicated web server may boot successfully but fail because its database accepts connections only from the old subnet. A worker may immediately resume consuming production jobs when launched for testing.
Document which systems must move together and which must remain reachable across environments. Take a verified backup before installing the agent or changing the machine. Continuous replication is not a substitute for an independent backup.
2. Prepare the Google Cloud destination
Choose a GCP project, enable billing, and enable the Compute Engine API. Select a destination region based on application latency, data residency, and proximity to dependent services.
If you use the Google Cloud SDK, basic project preparation can look like this:
# Replace this value with your destination project ID.
PROJECT_ID="your-gcp-project-id"

gcloud config set project "$PROJECT_ID"
gcloud services enable compute.googleapis.com
These commands do not configure CloudEndure or create its replication infrastructure. They only establish part of the GCP prerequisite setup.
Plan staging and target networks separately
Decide which VPC and subnet will host replication resources and which will host the launched application. They may share a network, but their access requirements differ.
The staging environment needs the connectivity required by CloudEndure. The application environment needs access to databases, users, monitoring, and other production dependencies.
Check all of the following:
- Subnet address ranges do not conflict with connected source networks.
- Routes, VPN connectivity, or internet access support the chosen topology.
- Firewalls permit the documented replication traffic.
- Administrative access is restricted to approved sources.
- Compute Engine quotas cover staging resources and test or production VMs.
Also budget for replication instances, persistent disks, test machines, and applicable network transfer charges. A staging area is designed to avoid running a full production-sized target continuously, but it is not free.
3. Connect CloudEndure to GCP
Create or select a CloudEndure project that explicitly supports migration to Google Cloud. Follow that project’s destination setup instructions to connect it to the correct GCP project.
Depending on the integration available to your account, this may involve a Google Cloud service account and credential file. Use the permissions documented for that integration rather than guessing a role or granting broad access simply to bypass an error.
Practical safeguards include:
- Use a dedicated migration identity instead of personal credentials.
- Keep credential files out of source control and shared documents.
- Restrict access to the CloudEndure console.
- Record which resources the integration is authorized to create or remove.
- Plan credential revocation after migration cleanup.
Complete the destination validation offered by the console. Resolve authentication, API, quota, and permission errors before installing agents across multiple servers.
Start with one noncritical machine. A small pilot validates the account integration and network path without turning a configuration mistake into a fleet-wide problem.
4. Install the agent and begin the initial scan
Use the installer and registration instructions provided by your CloudEndure project. Avoid copying an installer URL or installation token from an unrelated tutorial: versions and registration mechanisms can differ.
The normal sequence is:
- Confirm that the source OS and kernel are supported.
- Verify the required outbound connectivity.
- Download the installer from the documented source.
- Run it with the required administrator or root privileges.
- Register the machine with the intended CloudEndure project.
- Confirm that the machine appears in the console.
Treat registration tokens as secrets. Do not paste them into tickets, public scripts, or screenshots.
What to inspect after registration
Check that CloudEndure identifies the expected source machine and disks. Review disk sizes carefully, especially when the VM has separate boot, database, and application volumes.
Initial synchronization requires reading source storage and transmitting data. Its duration depends on disk contents, effective throughput, source storage performance, and the rate of ongoing writes, not just the VM’s nominal disk capacity.
Watch source application latency and disk utilization during this stage. If performance degrades, investigate resource contention and use supported replication controls where available rather than repeatedly restarting the agent.
5. Configure replication and the target blueprint
Keep two configuration categories distinct:
- Replication settings govern how data reaches and resides in the staging area.
- Target launch settings, often represented by a blueprint, govern the Compute Engine VM created for testing or cutover.
Review whichever controls your GCP integration exposes. Not every setting available for another cloud will have a direct equivalent.
Replication settings
Verify the destination location, staging subnet, connectivity path, and selected source disks. Where supported, review bandwidth limits and replication resource sizing.
Excluding a disk requires care. A volume that appears to contain temporary data may also hold application configuration or files needed at startup.
Target launch settings
Review the target machine type, destination zone, disk choices, network attachment, and access configuration. Ensure that the selected Compute Engine machine type has enough memory and CPU for the workload.
Plan how the launched VM will receive its application permissions. The identity CloudEndure uses to create infrastructure is separate from the service account an application uses at runtime.
Do not assume source IP addresses or hardware identifiers will remain unchanged. Applications licensed against machine identifiers, software with fixed interface names, and static network configurations deserve an explicit test.
6. Monitor synchronization and resolve stalled replication
Do not launch a production replacement merely because its source appears in the console. Wait for initial synchronization to finish and review the available replication health and lag indicators.
Persistent lag means the destination is not keeping up with source changes. Possible causes include insufficient bandwidth, heavy write activity, source disk bottlenecks, or constrained replication resources.
Use a structured troubleshooting order:
- Check agent health and installation logs.
- Verify DNS resolution and required outbound connections.
- Inspect firewall, routing, proxy, and VPN behavior.
- Check GCP quota and resource-creation failures.
- Compare source write activity with effective replication throughput.
Use the endpoint and port requirements documented for your specific CloudEndure deployment. Do not assume that allowing HTTPS alone covers every replication path.
Avoid deleting staging resources manually while troubleshooting. They may be managed by CloudEndure, and removing them can force resynchronization or disrupt recovery options.
7. Launch an isolated test VM
Use CloudEndure’s supported test-launch workflow after synchronization is healthy. Confirm how that workflow affects ongoing replication and which temporary resources it creates.
Place the test VM in a controlled network. Before it starts serving traffic, prevent unintended production activity such as sending email, running scheduled jobs, processing payments, or consuming messages.
Validate more than a successful boot:
- Operating system startup and administrative access.
- Expected disks, filesystems, and mount points.
- Application services and database recovery.
- Connectivity to required dependencies.
- Representative user transactions.
- Logging, monitoring, backup agents, and access controls.
For a basic local HTTP check on Linux:
# Adapt the address and port to your application.
curl --fail --show-error http://127.0.0.1:8080/
A successful HTTP response proves only that this endpoint answered. Test business-critical operations separately, and record every change needed to make the application function in GCP.
8. Perform a controlled cutover
Schedule a maintenance window and define a rollback decision point before switching production.
A practical cutover sequence is:
- Confirm backups and review the successful test results.
- Reduce DNS TTL in advance if DNS will control the switch.
- Pause incoming jobs and stop application writes on the source.
- Use application-aware shutdown or quiescing procedures where required.
- Wait for the final changes to replicate and verify synchronization status.
- Launch the production target through the supported cutover workflow.
- Validate services and redirect traffic.
- Monitor errors, latency, and data integrity closely.
Block-level replication does not, by itself, guarantee transactionally consistent state across multiple machines. Databases and distributed applications may need additional coordination or native replication procedures.
Keep the source stopped or isolated to prevent two writable production copies. If the target has accepted new writes, rollback requires a data reconciliation plan; changing DNS back is not enough. Do not assume automatic reverse replication or failback is available in your migration offering.
After migration: clean up deliberately
Once the agreed validation period ends, confirm that backups and monitoring work on the new VM. Then remove obsolete test machines, terminate replication through the supported workflow, and review remaining staging disks and instances.
Revoke migration credentials when no longer needed, update operational documentation, and decommission the source according to your retention policy.
Takeaway
CloudEndure can simplify a GCP-enabled migration by discovering source disks, continuously replicating changes, and launching a replacement in Compute Engine. A successful migration still depends on verified destination support, sound network planning, isolated testing, and an application-aware cutover, not replication status alone.
Conversation (0)
No comments yet. Start the conversation.
Join the conversation
Create a free member account to comment.